Handbook for Operators
Context
This document outlines the steps for operators to integrate with Symbiotic, using our Cosmos SDK based test network (stubchain) as primary example. Note that we've integrated Cosmos SDK with Symbiotic for demonstration purposes only. Throughout this guide, we'll focus on the Cosmos SDK implementation. We'll also explore a middleware contract as an additional example.
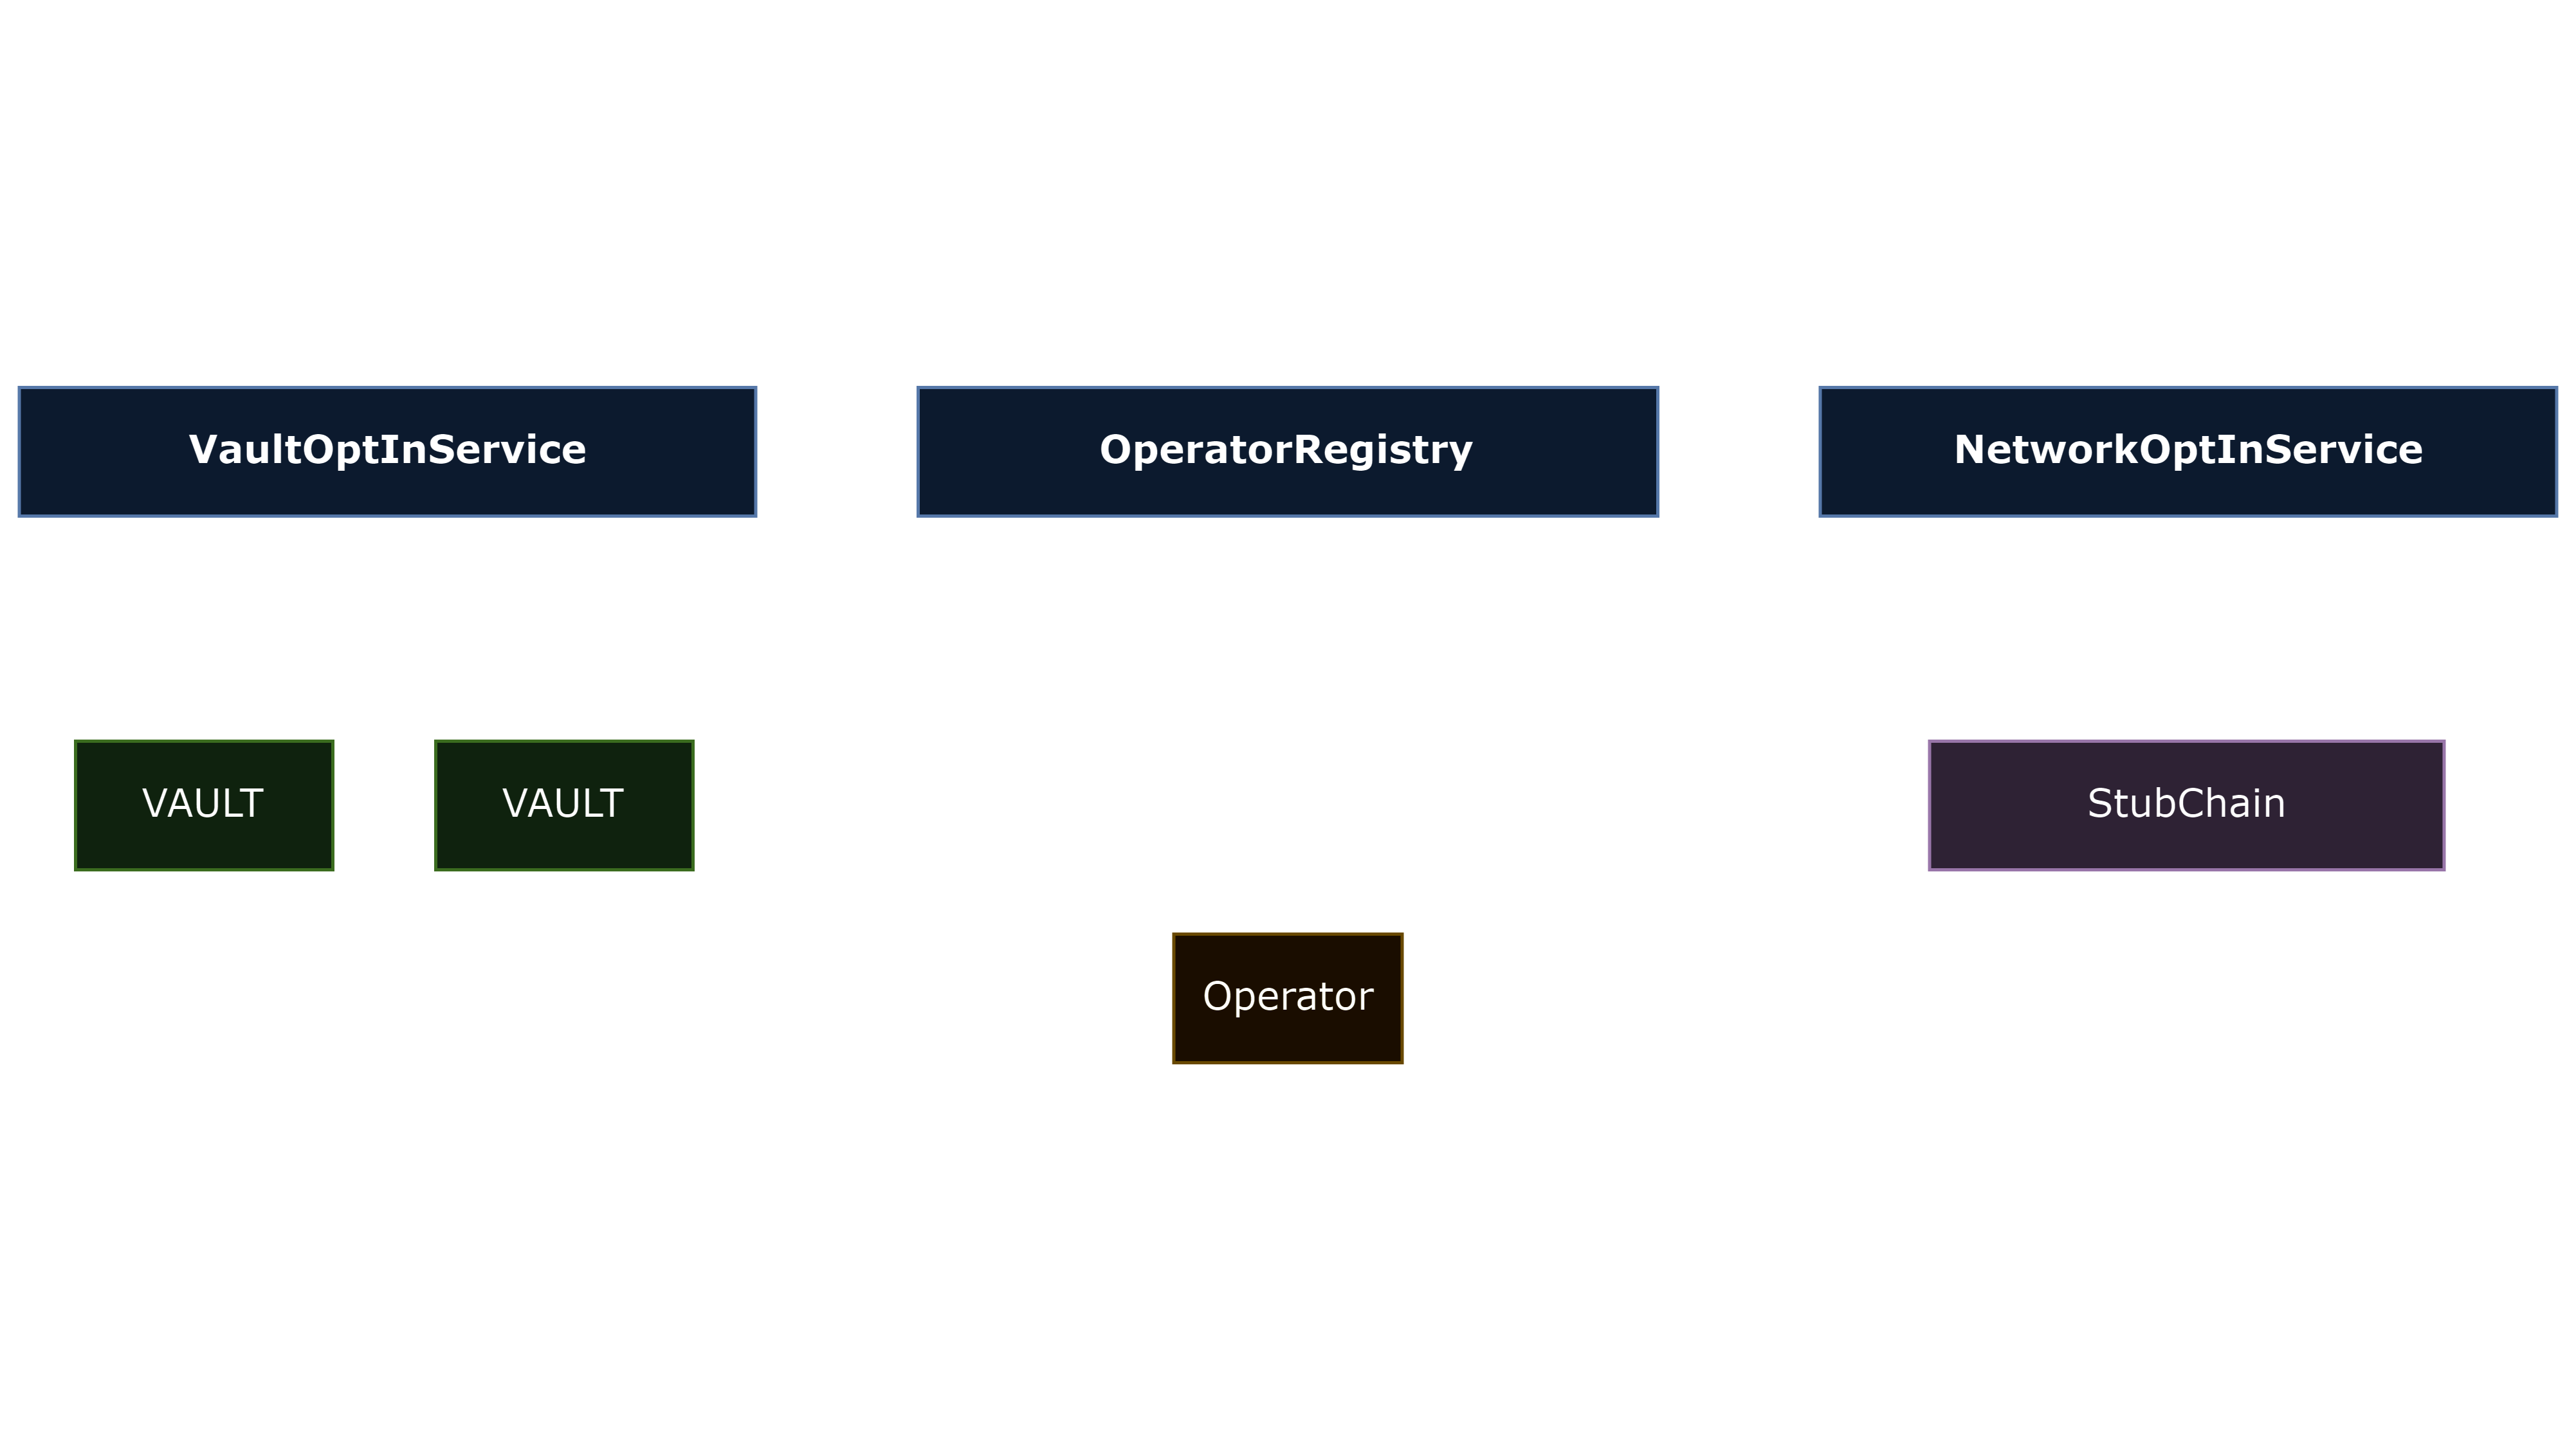
The Symbiotic ecosystem comprises three main components: on-chain Symbiotic core contracts, a network, and a network middleware contract. Here's how they interact:
- Symbiotic core contracts manage fundamental operations such as stake accounting, slashing, and delegations.
- Operators register in the OperatorRegistry and opt-in to vaults and networks to participate.
- Vault managers allocate stakes to operators in supported networks using various delegation models.
- The network middleware contract acts as a bridge between Symbiotic core and the network chain:
- It retrieves the operator set with stakes from Symbiotic core contracts.
- The middleware selects operators, specifies their keys, and determines which vaults to use for stake information.
- The network chain then fetches this curated operator set from the middleware contract.
For more information on how networks function within Symbiotic, please consult our networks-specific documentation.
Integration Guide
🌟 Introduction
Symbiotic is a shared security protocol that serves as a thin coordination layer, empowering network builders to control and adapt their own (re)staking implementation in a permissionless manner. It provides flexible (re)staking infrastructure for networks, operators, and stakers.
Our ecosystem allows anyone to build their ideal staking/restaking model using:
- Ready-to-go open-source components
- Custom modules compatible with Symbiotic Core
Symbiotic Core standardizes crucial elements of (re)staking such as stake accounting, slashing, and delegations.
This guide will walk you through how a network operates within the Symbiotic ecosystem and outline the integration requirements. We'll use our test network (stubchain), deployed on devnet, as an example.
⛓️ On-chain
Actions in Symbiotic Core
To become an operator in Symbiotic, you must register in the OperatorRegistry. This is the first step in joining any network. To become a validator, you need to take two additional steps: opt in to the network and opt in to the relevant vaults where the network has connections and stake. Once these steps are completed, vault owners can allocate stake to operators, but only up to the network's predetermined stake limit.
- Register in the OperatorRegistry contract using the
registerOperator()function. Verify your registration by callingisEntity(operator). - Opt in to the example vaults using this contract:
optIn(0xE9387B4abA8073988b462Db204af0f343F181a0d)optIn(0x89D62D1d89d8636367fc94998b3bE095a3d9c2f9)
- Opt in to the example stubchain network via this contract:
optIn(0xDD46e5C9618540489410033A1B690744B123b41D)
- Verify all opt-ins by calling
isOptedIn(operator, vault/network)using the contract above
For this section, you'll need an Ethereum EOA (Externally Owned Account) or a smart contract. If using an EOA, simply connect any wallet to Holesky Etherscan and call the required functions.
Actions in Network Middleware
The network middleware contract is a crucial component in the Symbiotic ecosystem, serving as the interface between Symbiotic core contracts and the network. Here's an overview of its primary functions:
- It retrieves the operator set with stakes from Symbiotic core contracts.
- In our example middleware, the administrator chooses operators, assigns their keys, and selects which vaults to use for stake information. Note that this process may vary in other network middleware implementations.
- The network then fetches this curated operator set from the middleware contract.
While Symbiotic doesn't require networks to use a specific implementation of the NetworkMiddleware, it defines a Core API and provides open-source SDK modules and examples to simplify the integration process.
For our test network (stubchain), operators don't need to perform any actions in the network middleware, such as key registration. Our team will handle this process for you. However, in production, each network may have its own requirements and API for registration.
🌌 Stubchain (Cosmos SDK)
Overview
Setting up a Stubchain validator for Symbiotic requires node configuration, environment setup, and validator transaction creation. This technical process demands a solid understanding of blockchain operations and command-line interfaces.
Step-by-Step Guide
1. Set Up RPC URLs
Configure your environment with the necessary RPC URLs:
export BEACON_API_URLS=<your_beacon_rpc_url>
export ETH_API_URLS=<your_eth_rpc_url>
Our testnet contracts are deployed on Ethereum's Holesky Testnet, so RPC URLs must be for Holesky. It's crucial for security that each Cosmos SDK validator has its own beacon chain client, as it's the source of finalized Ethereum blocks. Using public beacon chain RPCs can compromise the validity of finalized block numbers. We strongly encourage you to set up your own beacon client for each validator!
2. Start a Node
Follow these steps to initialize and run your node:
-
Set the network middleware address:
export MIDDLEWARE_ADDRESS=0x43574e3AeF4E3B29041AA34f09a4b1C8a2F4C1E6 -
Clone the repository or download the binary:
git clone https://github.com/symbioticfi/cosmos-sdk -
Build the node:
make build-sym -
Navigate to the
builddirectory or add thesymdbinary to your$PATH -
Initialize the node:
symd init <your_moniker> --chain-id chain-1wIcHj -
Copy the
genesis.jsonfile to the~/.symapp/config/directory from thestubchaindirectory in the cosmos-sdk repository:cp stubchain/genesis.json ~/.symapp/config/ -
Add our peers to the
~/.symapp/config/config.tomlfile. In the[p2p]section, update both theseedsandpersistent_peersparameters."716f3d6c6b6cdb2c3e980641c8a2f2e2a5089cbb@node-01.stubchain.symbiotic.fi:26656,30a07da2029074bd48d5bf53423f8f4ebe706167@node-04.stubchain.symbiotic.fi:26656,f3e411655b1af5f83f31ecd8acc2567f358ac18f@node-06.stubchain.symbiotic.fi:26656" -
Create operator keys (learn more):
# Choose a keyring backend from the URL above
symd keys add <key_name> --keyring-backend <keyring_backend> -
Start the node
symd start -
Allow the node to fully synchronize with the network. This process may take some time, depending on network conditions and the current blockchain height. Once synced, your node will be up-to-date with the latest blocks and ready for validator creation. Verify synchronization status with this command: `jsx
this should return "false"
curl -s 127.0.0.1:26657/status | jq '.result.sync_info.catching_up' `
3. Create Validator
After your node has synchronized and our test network administrators have registered your operator in the middleware contract, you can create your validator:
-
Create and populate
validator.jsonwith your information{
"pubkey": {
"@type": "/cosmos.crypto.ed25519.PubKey",
"key": "<your pub_key from priv_validator_key.json>"
},
"moniker": "<your node moniker from step 2.5>",
"commission-rate": "0.1",
"commission-max-rate": "0.1",
"commission-max-change-rate": "0.1"
} -
Broadcast the create-validator transaction:
symd tx symStaking create-validator validator.json \
  --chain-id=chain-1wIcHj \
  --from=<key_name> \
--keyring-backend=<keyring_backend> -
Verify your validator status by querying the network. Information about your node should appear, though it may take some time to be added as a validator since synchronization with Symbiotic occurs every 10th block height:
symd query symStaking validators
The test network gas cost is zero, so feel free to broadcast transactions. You won't need any tokens to send transaction.
4. Monitor Your Node
Set up monitoring for your validator node to ensure optimal performance and uptime. Remember to configure automatic restarts in case of Symbiotic update errors.
By following these steps, you'll successfully set up and run a Cosmos SDK validator node for the Symbiotic network. Remember to stay updated with the latest network developments and maintain your node regularly.
⚡ Validator activation
To complete the integration process, you need to send your operator data to our test network administrators. This allows us to register your operator in the network middleware contract, which maintains the active operator set data.
Please provide the following information:
- Your Ethereum operator address
- Validator consensus
addressin hexadecimal format from the~/.symbiotic/config/priv_validator_key.jsonfile (this file will be created after executing the Cosmos SDK setup instructions)
Example of the validator consensus address:
{
  "address": "970B82F2927D94D29DCA6CF0F21DC164154C28DA"
}
You can submit your operator address and pubkey by creating an issue in our GitHub repository - see template.
Once we receive your information, our network administrators will register your operator, allowing you to participate in the network.
Don't hesitate to share your Ethereum operator address and validator consensus address. These are public components of your keys, so it's completely safe to provide them.
Creating Own Vaults for Operator-Specific Delegations
Operators have the flexibility to create their own vaults with customized configurations, which is particularly interesting for operators that seek to exclusively receive delegations or put their own funds at stake. This approach offers several advantages:
- Control: Operators maintain full control over stake allocation and delegation strategies.
- Customization: Vaults can be tailored to specific network requirements and operator strategies, including e.g. institutional compliance constraints.
- Efficiency: By using only their own validators, operators can streamline operations and potentially increase returns.
- Brand Building: Custom vaults allow operators to create unique offerings, differentiating themselves in the market.
- Risk Mitigation: By using their own validators exclusively, operators can eliminate the risk of potential bad actors or underperforming nodes from other operators.
When creating their own vault, operators can configure parameters such as delegation models, slashing mechanisms, and stake limits to best suit their operational needs and risk management strategies. This approach ensures that the vault is free from the risks associated with other operators, providing a more secure and controlled environment, especially useful for institutional stakers.
📢 For more information about vaults and how to set them up, please refer to our vaults-specific documentation.
Creating your own vault is not a necessary step for integrating with our stubchain.